
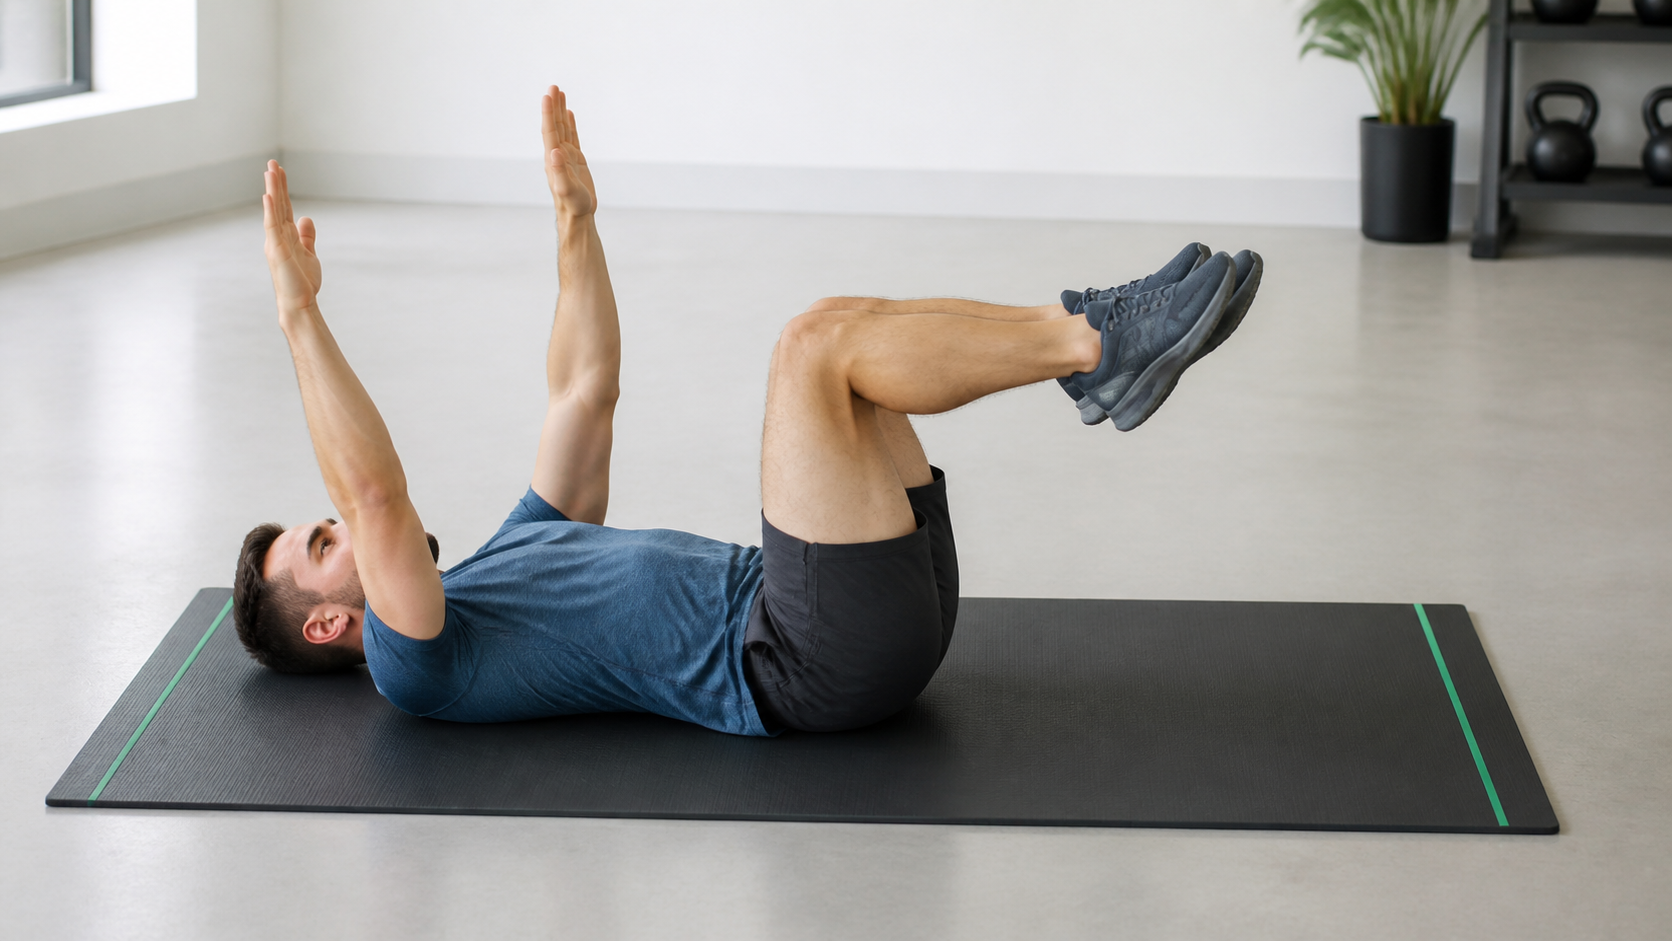
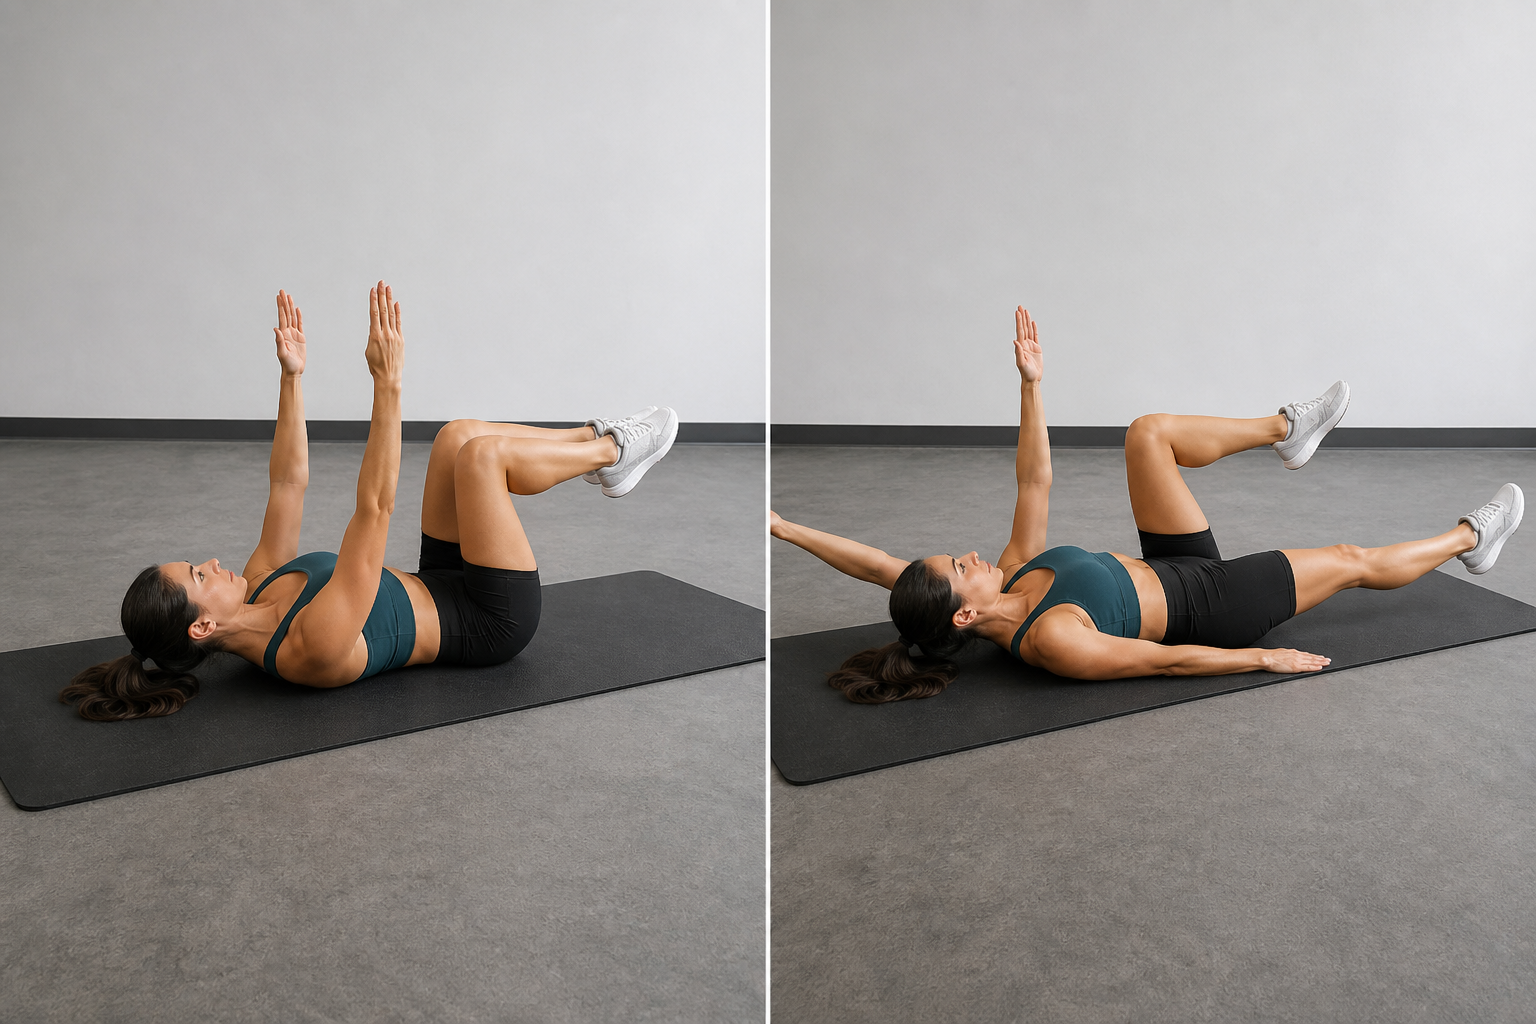
The dead bug exercise has an unfortunate name and an excellent job: teaching your trunk to stay controlled while your arms and legs move. You lie on your back with limbs in the air, which does resemble an overturned insect, but the exercise is far more useful than the branding department suggests.
Dead bugs require no equipment, scale from gentle to genuinely challenging, and fit well into a warm-up or core workout. The goal is not to move your limbs as far as possible. The goal is to move them only as far as you can while keeping your ribs, pelvis, and lower back controlled.
Quick answer: Lie on your back with hips and knees bent about 90 degrees and arms pointing upward. Brace gently, exhale, and slowly lower one heel and the opposite arm without letting your lower back arch. Return and switch sides. Start with two sets of five controlled repetitions per side.
What muscles does the dead bug work?
- Deep abdominal muscles: They help control pressure and spinal position.
- Rectus abdominis and obliques: They resist extension and rotation as the limbs move.
- Hip flexors: They control the legs, especially in longer-lever variations.
- Shoulder and upper-back muscles: They position and move the arms.
- Diaphragm and pelvic-floor system: Breathing and pressure management contribute to trunk control.
The dead bug is commonly described as an anti-extension exercise because your abdominal muscles resist the lower back arching as the arm and opposite leg travel away from the center. It also trains contralateral coordination—the same opposite-arm, opposite-leg pattern used during walking and running.
Benefits of the dead bug exercise
Teaches trunk control
The floor provides immediate feedback. If your lower back lifts dramatically as the leg extends, the movement has exceeded your current control. Shorten the range and you can practice successfully.
Scales easily
You can begin with heel taps, progress to opposite-arm and leg extensions, then add bands, a stability ball, or light weights. Few exercises offer that much adjustment without requiring a machine that looks like spacecraft equipment.
Fits into many workouts
Use dead bugs during a warm-up, between strength exercises, in a home routine, or as focused core work. They create little impact and usually little fatigue when performed with sensible volume.
How to do a basic dead bug
- Lie faceup on a mat with your knees bent and feet on the floor.
- Lift your legs until hips and knees are each bent roughly 90 degrees.
- Reach both arms toward the ceiling with wrists above shoulders.
- Gently exhale and bring your ribs toward your pelvis without crushing your lower back into the floor.
- Slowly lower your right heel and left arm toward the floor.
- Stop before your back arches, ribs flare, or breathing becomes strained.
- Return to the starting position with control.
- Repeat with the left heel and right arm.
Move for roughly two to three seconds away from the body and two seconds back. A slower, smaller repetition is more valuable than a dramatic limb launch followed by spinal interpretive dance.
Breathing and lower-back position
Your spine has a natural curve, so you do not need to flatten it with maximum force. Instead, prevent the arch from increasing as the limbs move. Exhale during the extension to help bring the ribs down, then inhale as you return. Keep the brace firm enough for control but light enough that you can breathe.
If you feel the exercise mainly in the front of the hips, reduce the leg range, keep one foot down, or use heel taps. If your neck strains, rest the head fully on the mat and keep the chin neutral.
Dead bug regressions and progressions
| Level | Variation | How to perform it |
|---|---|---|
| 1 | Supine march | Keep both arms down and lift one foot at a time |
| 2 | Heel taps | Hold arms up and tap one heel to the floor |
| 3 | Opposite arm and heel tap | Move one arm with the opposite bent leg |
| 4 | Full dead bug | Straighten the opposite arm and leg |
| 5 | Band or pullover dead bug | Add light resistance while preserving position |
Regression 1: Supine march
Keep both feet down. Brace gently and lift one foot a few inches without letting the pelvis shift. Alternate sides. This teaches control with the shortest practical lever.
Regression 2: Heel tap
Begin in the 90-degree position and lower one heel to touch the floor. Keep the knee bent. The shorter lever reduces demand while preserving the basic pattern.
Progression 1: Stability-ball dead bug
Press a stability ball between both hands and thighs. Keep pressure with one hand and the opposite thigh while extending the free arm and leg. The ball provides feedback if the trunk loses tension.
Progression 2: Banded dead bug
Anchor a light resistance band behind your head and hold it with straight arms over the chest. The band tries to pull your ribs upward, increasing the anti-extension demand. Use secure equipment and very light resistance at first.
A 4-week beginner plan
| Week | Variation | Sets and reps |
|---|---|---|
| 1 | Supine march or heel tap | 2 × 5/side |
| 2 | Heel tap with opposite arm | 2 × 6/side |
| 3 | Full dead bug, comfortable range | 2–3 × 5/side |
| 4 | Full dead bug with slower tempo | 3 × 6/side |
Train two or three nonconsecutive days per week. Stop each set when the back begins to arch or coordination becomes inconsistent. Quality is the progression gate.
Common mistakes
- Lowering too far: Use the range you can control today.
- Moving too fast: Slow repetitions expose and improve control.
- Holding your breath: Exhale through the difficult portion.
- Forcing the back painfully flat: Maintain comfortable spinal control rather than maximal pressure.
- Doing endless repetitions: Five excellent reps beat twenty loose ones.
- Starting with weights: Master the unweighted pattern first.
Where to place dead bugs in your workout
For a warm-up, perform one or two sets after light general movement. For core training, use two or three sets near the end of a workout. You can also pair them with an upper-body exercise because the dead bug creates little local fatigue in the arms.
Add them to our 10-minute beginner warm-up or use them as accessory work in the 3-day beginner gym plan.
Dead bug versus bird dog
Both train opposite-arm and leg coordination while the trunk resists unwanted movement. The dead bug is performed on your back and emphasizes resisting extension. The bird dog is performed on hands and knees and adds shoulder and hip balance demands. Neither is universally better. Many programs use both.
Frequently asked questions
Should my lower back touch the floor?
A gentle connection can provide feedback, but you do not need to smash the natural curve flat. Prevent the back from arching farther as the limbs extend.
Why do I feel dead bugs in my hip flexors?
The hip flexors work to control the legs. Excessive strain can mean the variation is too difficult, the leg is extending too low, or abdominal position is being lost. Try heel taps.
Can dead bugs reduce back pain?
They may be included in some rehabilitation programs, but back pain has many causes and no single exercise treats everyone. Seek assessment for severe, persistent, worsening, or radiating pain, weakness, numbness, or changes in bowel or bladder control.
The bottom line
The dead bug is simple to learn and difficult to fake when you focus on the right goal: quiet trunk, smooth limbs, normal breathing. Begin with heel taps, control the range, and progress slowly. Looking slightly ridiculous on the floor is temporary; useful core control can stay with you.
Technique reference: American Council on Exercise: Supine Dead Bug.
Keep learning: 15-minute balance and core routine and Copenhagen plank progression guide offer practical next steps on this topic.
Leave a Reply